
This is an ongoing project. You can read the story of how we acquired the couch and see what it looked like inside here. In this post, I show how I got the frame ready to be reupholstered.

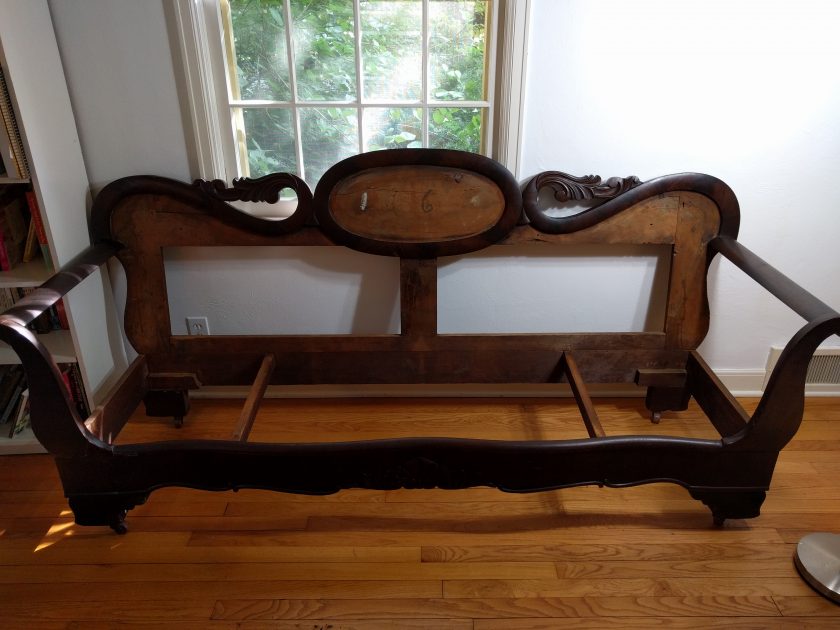
The first thing I did was use Murphy’s Oil Soap (only like my favorite cleaning product ever) to wipe down all of the wood surfaces. The wood was incredibly dirty; I went through like 7 buckets of soapy water (for comparison, cleaning my kitchen floor takes one). Wiping it down also helped remove the splinters that resulted from removing all of the tacks.
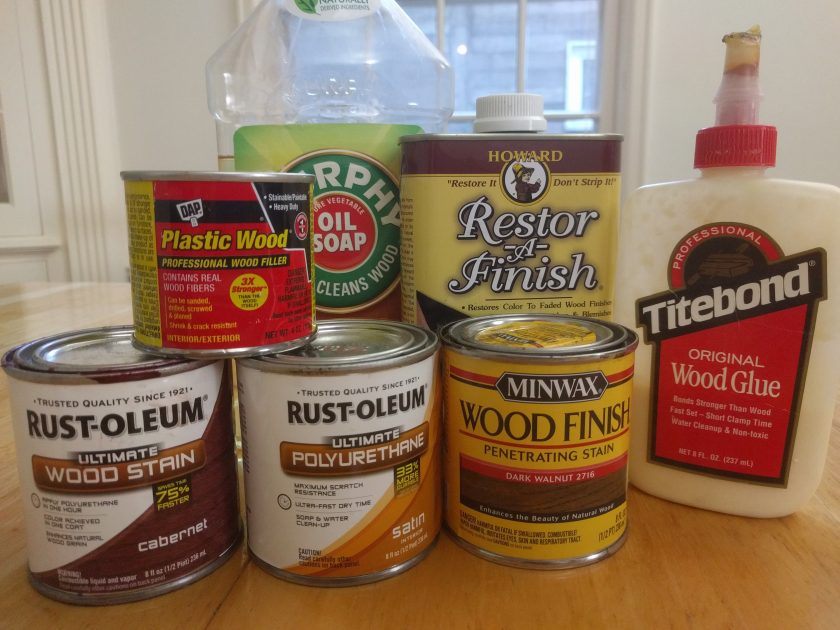
For the unfinished parts, this was all I did, and I went ahead and brought them inside. For the finished wood, I used a product called Restor-a-Finish to refresh the finish. I didn’t feel like the condition necessitated complete stripping and refinishing, especially since I’m fine with some marks to show its age. This product was super easy to use, all you have to do is wipe it on and let it dry. I was really happy with how it looked after using it. (I did test it on a small part before doing the whole frame.)
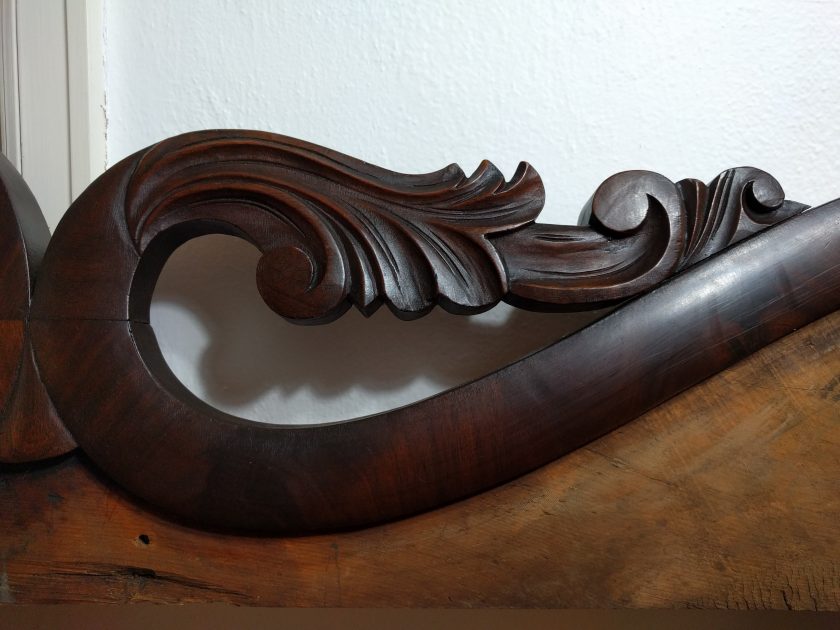
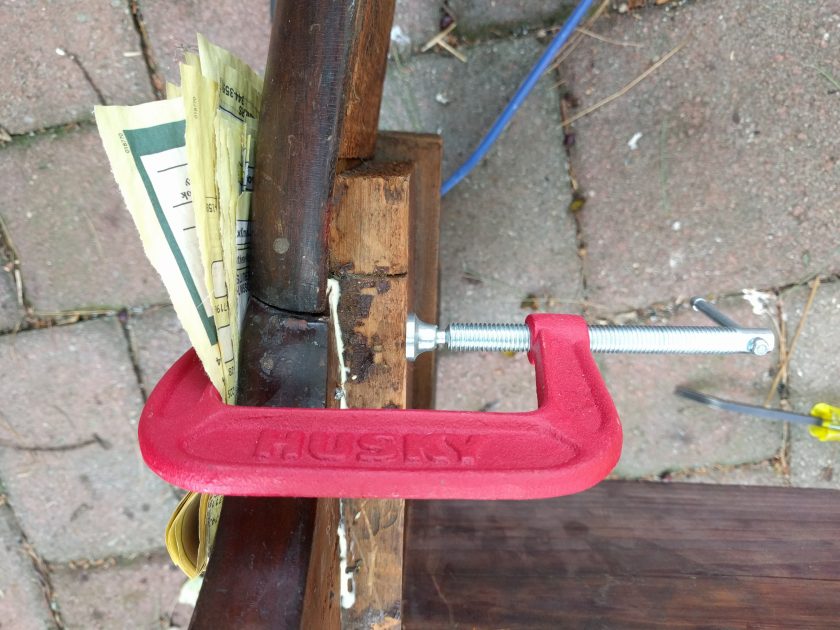
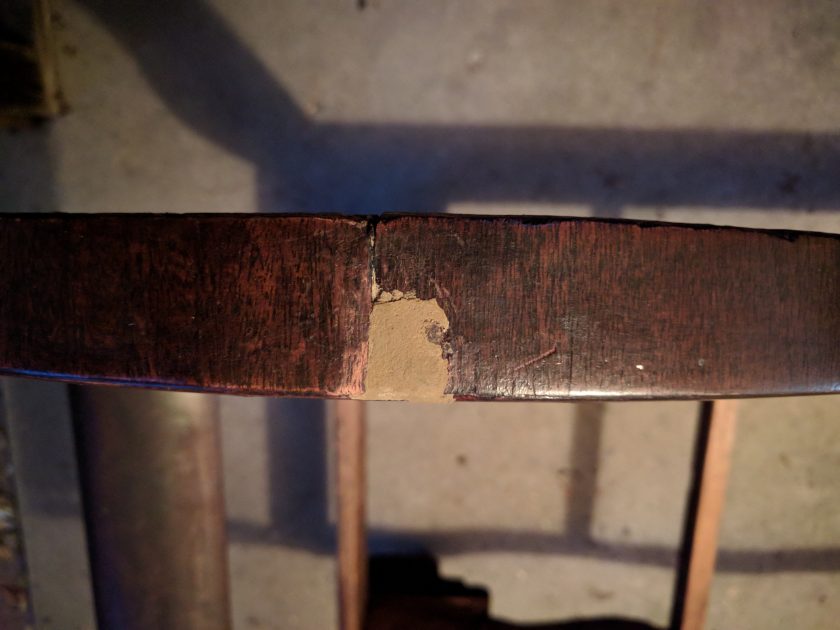
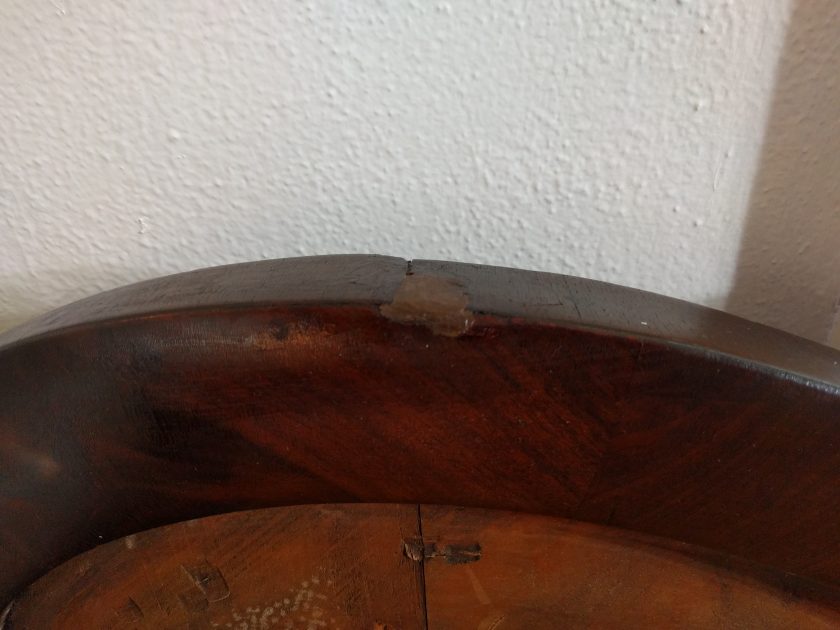
The next thing I did was to glue a couple places where the frame was a little loose. Overall it is quite solid– it has lasted over 100 years after all. There were a couple chips I filled in with wood filler. I then had to stain these and finish them. I am not totally happy with the color they came out, but I can live with it.

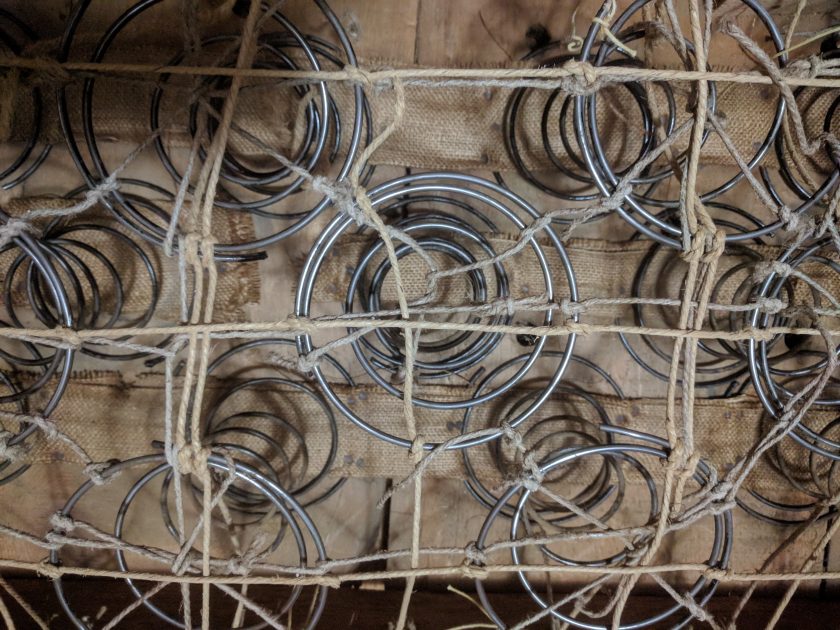
The hardest part to clean was the seat. The springs actually rest on wood, unlike most upholstery, in which the springs rest on webbing. The entire seat is a separate piece that just sits on the frame. Since I am leaving most of the spring ties and the springs in place cleaning it was challenging. We first turned over the seat and shook out as much stuff as we could. I then used the hose attachment on my vacuum to get in around the springs. There was so much stuff that my vacuum got clogged up. After we got the vacuum cleaned out, I loosened up the remaining debris and we shook the seat again. This left less stuff for the vacuum and I was able to finish cleaning. The seat is not spotless, but it is so much cleaner than it was.
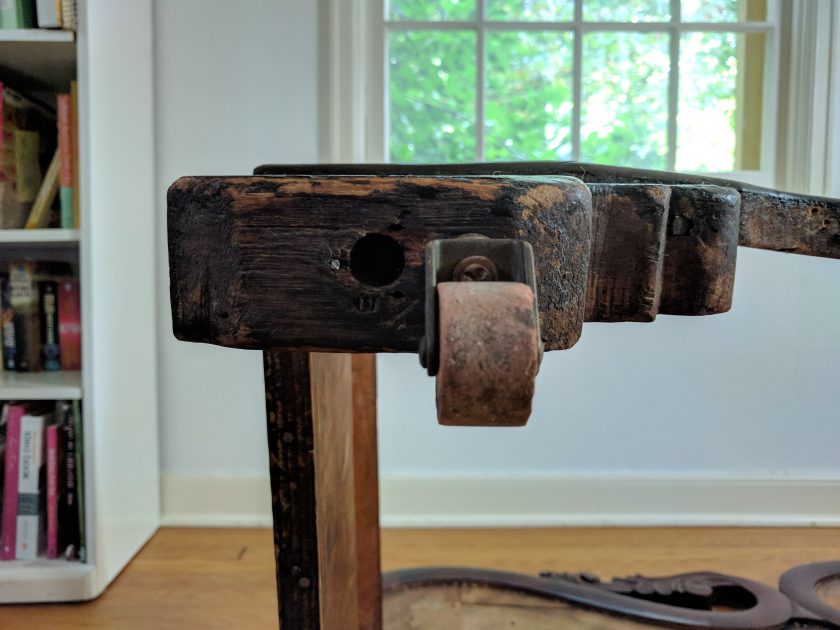
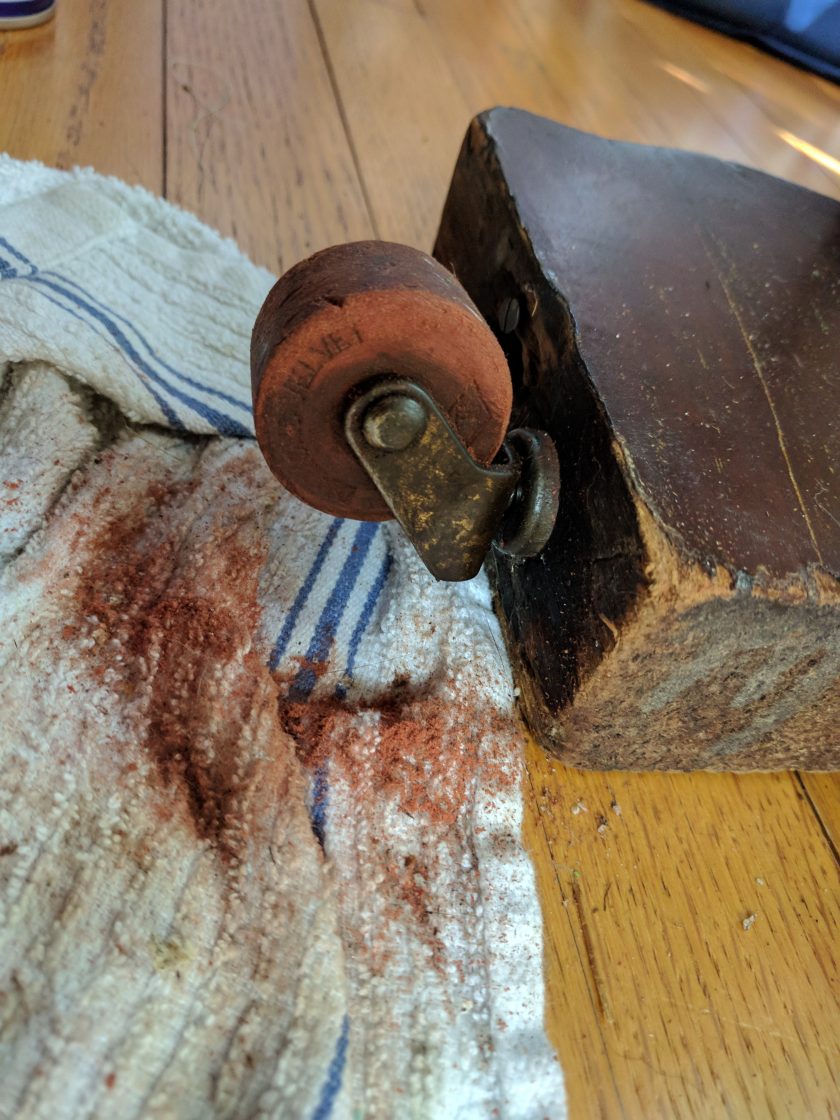
The last thing I did was take a look at the castors. Some of them weren’t spinning freely, but we really wanted the wheels because once the couch is put together it is heavy. These are not the original castors; they were likely added in the 1920’s. We found an ad for the brand, and it said that the wheels were rubber. Naturally, the wheels have hardened over time, and some of them were distorted and could no longer spin. I used sand paper to sand off the bits that were sticking, and now they spin just fine.
At this point, the frame is touched up and ready for reupholstering. I am reading up on traditional upholstery techniques while I wait for some supplies to arrive. Between my references and the photos I have of the original stuffing, I’m feeling quite confident. My goal is to finish by Thanksgiving, so hopefully I will have more progress soon.

I finally got a chance to check this out after we talked. Looks like it’s really coming along Kiri. I admire your ‘can do’ attitude and willingness to tackle new projects. I’ll keep an eye out to see the finished product.
I’m glad you got to check it out. My goal is to have it finished before Thanksgiving so hopefully I’ll have more up soon!
The clock is ticking! Can’t wait to sit in it!