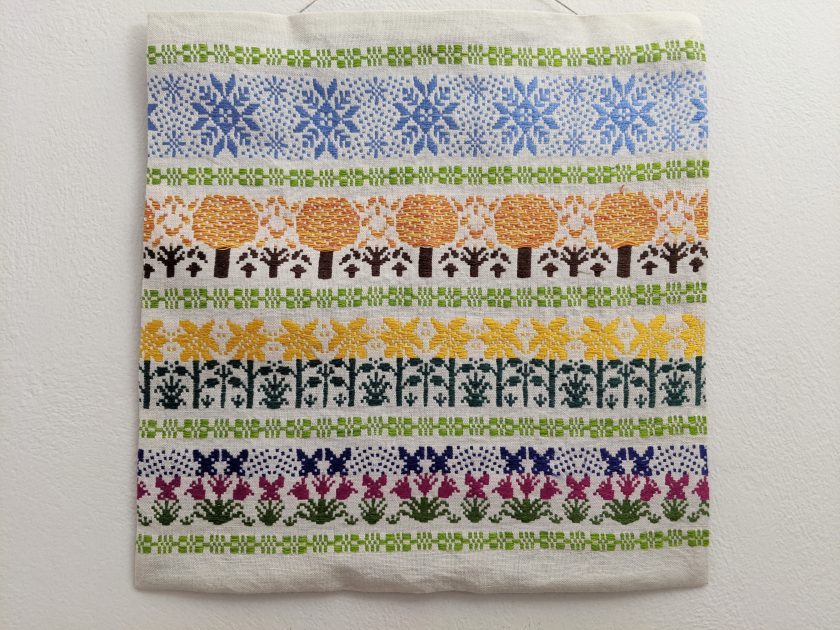
This opphamta drawloom piece is one of the coolest things we got to weave during our 15-weeks at the Vävstuga Immersion Program. (See here to learn more about this program.) I also recently found a great interview with my teacher, Becky Ashenden, on another weaver’s blog.
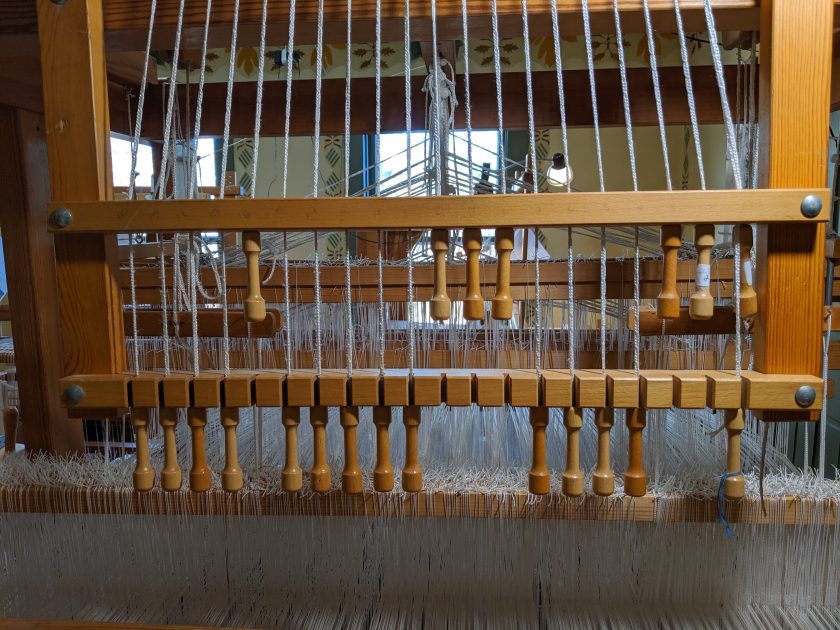
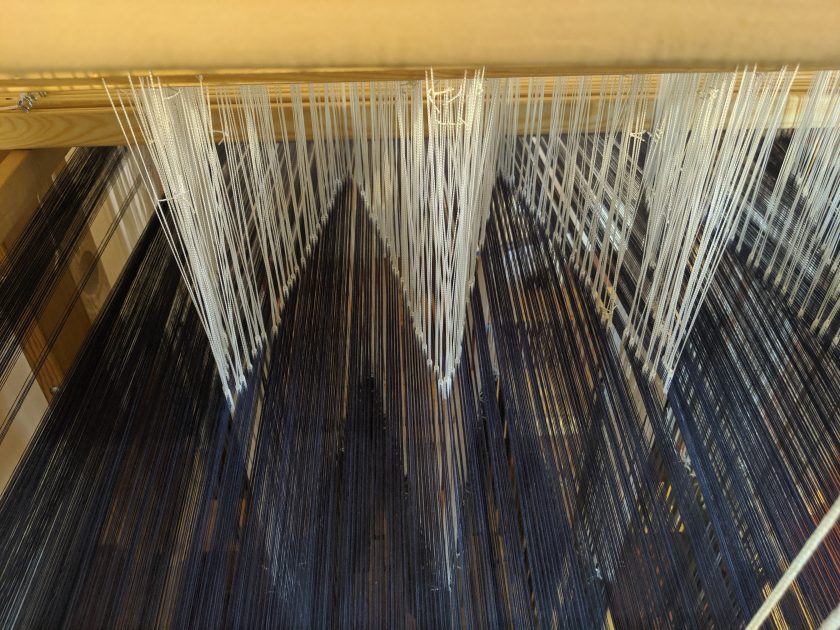
Drawlooms are really special because they essentially restore some of the freedom that was lost as looms became optimized for speed. When people started weaving, looms were very simple; essentially they just provided a way to hold tension on the warp. The weft had to be manipulated under and over each string. Because each weft was laid in by hand, the weaver was completely free to create any pattern they wanted. By adding rigid heddles and later multiple shafts to lift the warp threads up and down, weaving became much faster, but the weaver sacrificed some freedom in how they could place the weft. The drawloom brings back a lot of that freedom because it allows the weaver to control small groups of threads individually, but it does take significantly more time to weave.
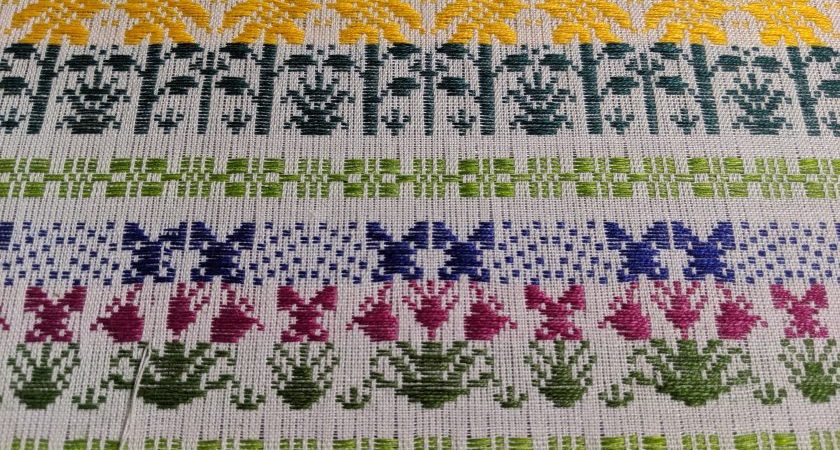
The drawloom warps were the only warps that we did not wind and dress ourselves. All the threading had already been done for us. This piece is a structure called opphamta. Like monksbelt and overshot, the pattern is created by floats over a plain weave ground. There is actually a related structure called smålandsväv that I will talk about in a later post.
The loom was set up with 21 pattern shafts, threaded on a point. What this means is that you can design something that is 21 squares wide and those 21 squares are mirrored across a point. So, if you want to “draw” a tree, for instance, you design half of the tree to be 21 squares wide and when it is woven it will be a whole row of trees.
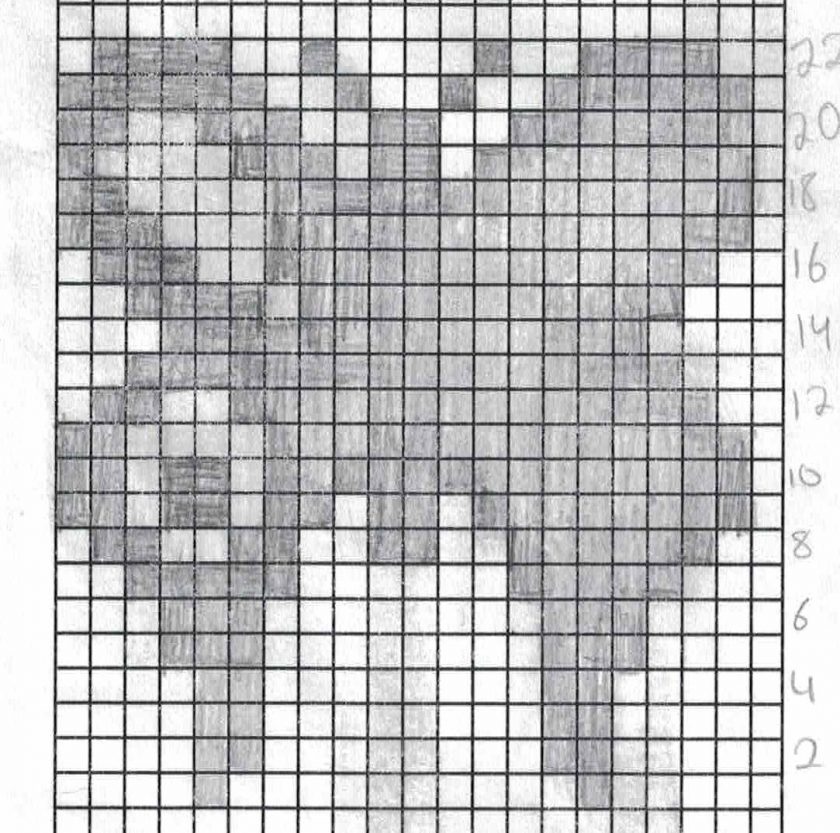
The other important design consideration is the size of the floats. You can weave a float that is a couple inches long, but it is not going to look good or be structurally sound. I completely forgot about this when I started designing and had to start over. You also have to remember that whatever color you use in a row has to be the same all the way across. Once I got the hang of it, I really enjoyed designing for the drawloom.
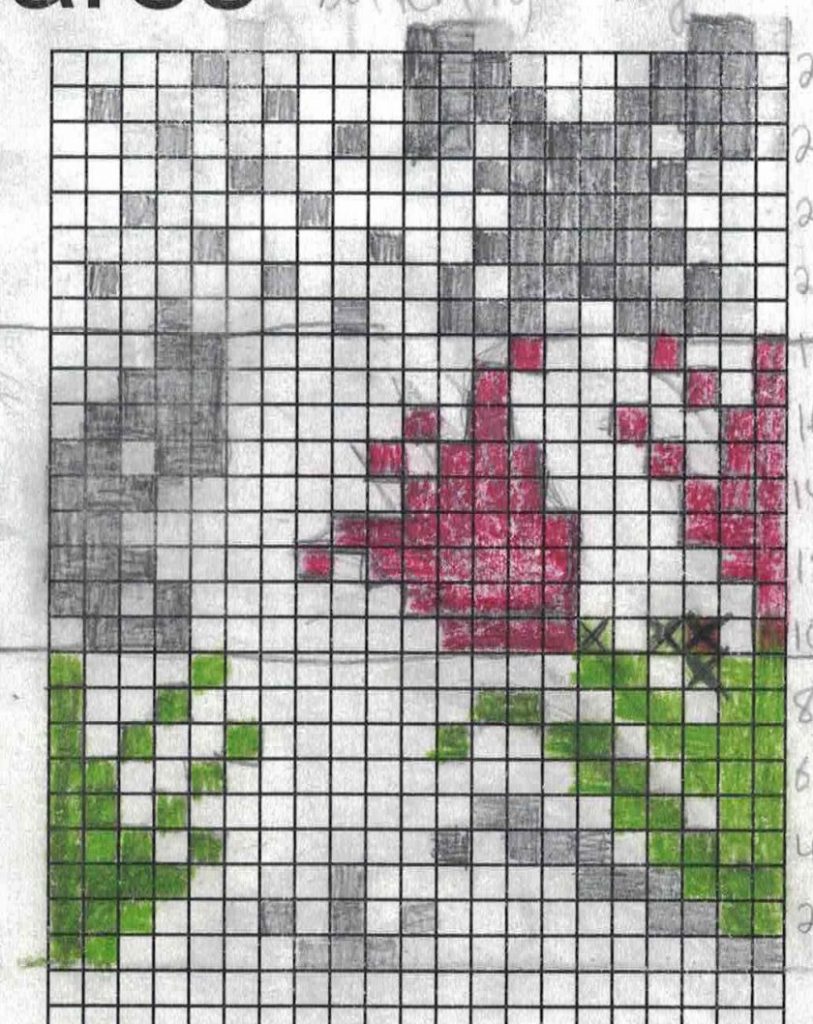
I learned very quickly when weaving this to check and doublecheck my pattern before throwing the shuttle. Undoing feels especially painful because each row takes so long. I took a video of pulling the shafts, so you can get a feel for what weaving this was like. Even though it is tedious, I actually loved using the drawloom. Going in, I thought it would be something that I would enjoy doing once but wouldn’t necessarily feel the need to do again. Now, I really wish I had one!

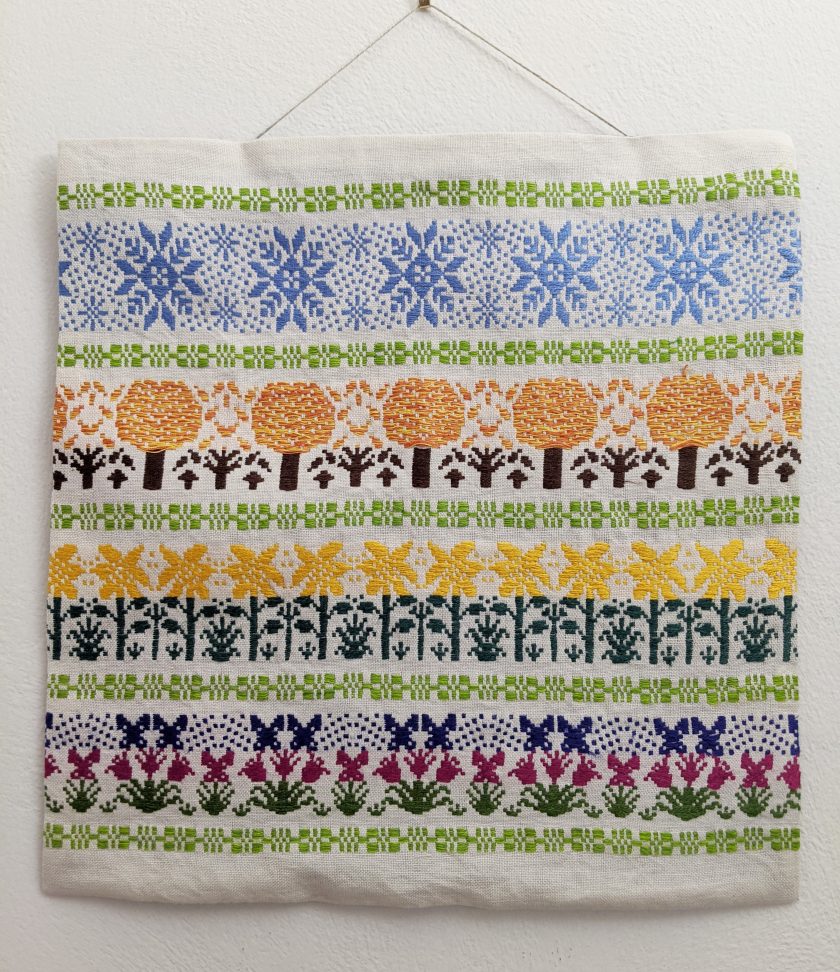
Once I got home, I chopped my piece into thirds and made three wall hangings. I kept one for myself and gave the other two to my mom and my sister. I hope they enjoy them as much as I do.

Your opphamta piece is truly amazing. The colors and details are superb!
Thanks!